Monday, October 19, 2015

Comparison of Mac OS X 10.11 El Capitan and 10.10 Yosemite


Compare to the previous generations of Mac OS X 10.10 Yosemite, there are many new welcome features in 10.11 El Capitan. Fortunately, Mac users are able to upgrade to the new El Capitan for free or easily partition Mac to install both El Capitan and Yosemite for conveniently switching one to another. Following article will make a detailed comparison of El Capitan and Yostemite in many mayor aspects. 

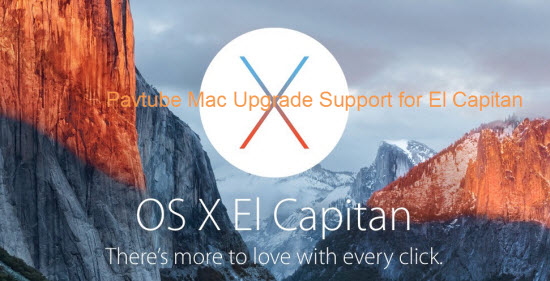
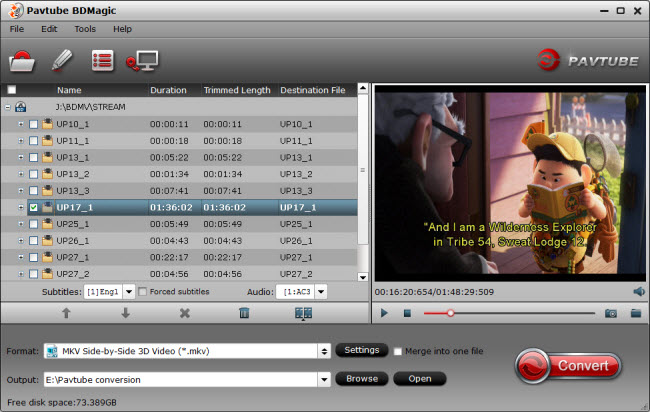
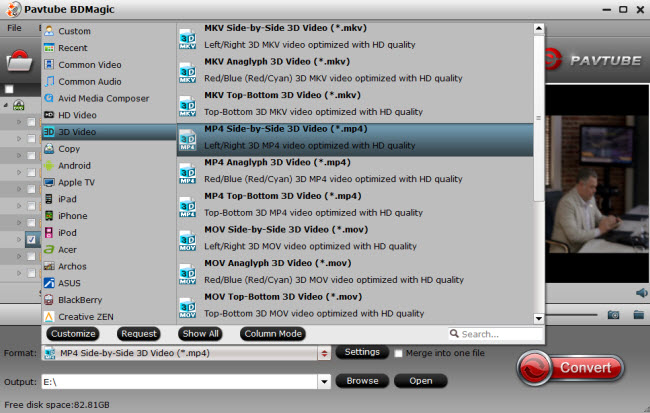
Pavtube has upgraded with El Captian support for all its Mac Blu-ray/DVD/Video products. 


Performance in El Capitan VS Yosemite 

Apps in El Capitan will load apps up to 1.4 times faster and switching between apps will be twice as fast. Compare that to Yosemite: since its introduction many Mac users have been painfully aware of lags and slowdowns, such as stuttering animations and network connectivity issues. We experienced nothing like this in El Capitan. 

Look and feel in El Capitan vs Yosemite 

OS X El Capitan's user interface use a variation of the San Francisco font that was introduced with the Apple Watch and also features the iOS 9. San Franciso is much more Retina-friendly compared to Yosemite's use of Helvetica Neue. 

Force Touch trackpad support was introduced with Yosemite and in El Capitan there's additional setting within the Trackpad pane of System Preferences to deactivate the click noise. Referred to as Slient Clicking, this somehow doesn't compromise the degree of feedback, which is still handled via the Click slider. 

The El Capitan bar can now autohide via a setting in the General pane of System Preferences, in the same way that the Dock can dive out of the bottom of the screen in Yostemite and earlier releases of OS X. If you've used Full Screen mode in Yosemite then you'll already have experienced this feature but now it can be used all the time to gain a precious few centimeters of desktop space. 

Core tools in El Capitan vs Yosemite 

Safari: The new Safari on Mac OS X El Capitan is the perfect browser tool for your Mac device. The New Safari allows you to Pin your favorite websites, thus you can keep them opened, likewise you can mute audios without checking the tab from which the sound is coming from. The Develop menu of Safari, accessible via the Advanced pane within Safari's Preferences, now features a cool Responsive Design mode that lets you switch the web page to dimensions used on various Apple devices. 

Mail: As with Safari, feature additions in Mail within El Capitan are subtle compared to Yosemite. With the new Swipe gesture and improved full screen support, you can now optimize the way you read or manage your mails better on Mac OS X El Capitan - you can use this feature as a quick correspondence handler, and also manage your contacts and calendar much better from your inbox. With one swipe, you can mark an email as read or unread. 

Notes: Notes in El Capitan is essentially a whole new app compared to Yosemite, featuring more control over text formatting. The app is also now a share destination from within other apps, so you can send a map location straight to a new note, for example, or even a file from Finder/the desktop. The Reminders app can also receive items in this way via its own new entry on the share menu. To gain access to the new notes features, make sure upgrade your Notes iCloud database when you first run Notes on El Capitan, but doing so also makes your existing notes instantly incompatible with earlier versions of Apple's operating system. 

Maps: The enhanced Maps available on Mac OS X El Capitan provides maximum public transit information you can ever ask for, thus you will never miss your way even in a big city. You will have access to in-built public transport maps, directions and schedules. With El Capitan, you can easily plan your route with just few clicks. 

System tools in El Capitan vs Yosemite 

Spotlight: The new Spotlight window introduced in Yosemite can be moved around in El Capitan by clicking and dragging. It can also be resized to show more than a handful of results. Spotlight in El Capitan can also respond to Siri-like queries, such as "photo from last November in Germany". 

Mission control: El Capitan also comes with a full screen tweaks and mission control features. The mission control displays the names of existing apps at the top of the screen page, and this has replaced the thumbnail feature on the Yosemite. 

Disk Utility: Disk Utility has been given a visual overhaul compared to Yosemite and now features a bar graph showing how full a partition is, and what kind of files are taking up the space. 

Disk Ultility: The Disk Utility has been given a visual overhaul compared to Yosemite and now features a bar graph showing how full a partition is and what kind of files are taking up the space. Disk repartitioning within Disk Utility is now handled via a more common sense pie chart representing the entire disk, with a handle on its border that can be dragged to resize individual partitions. 

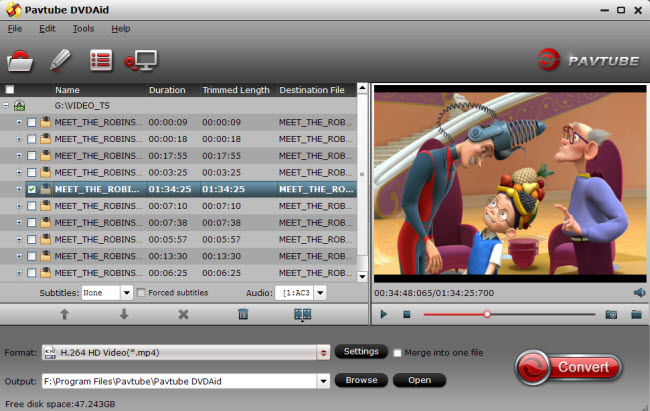
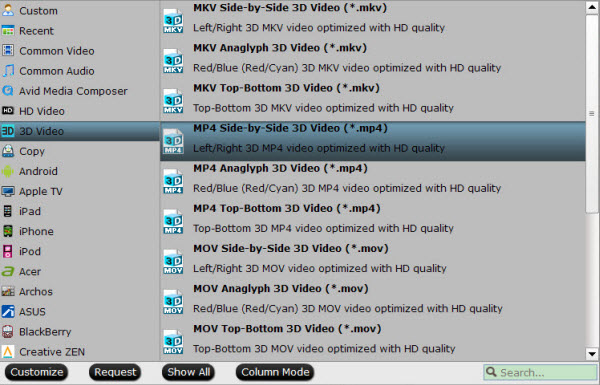
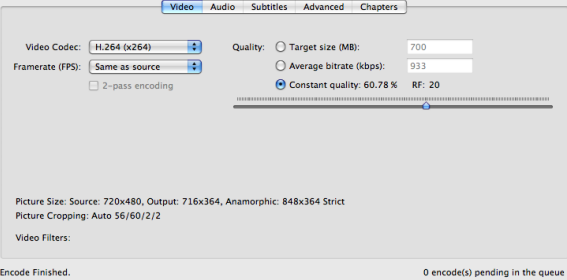
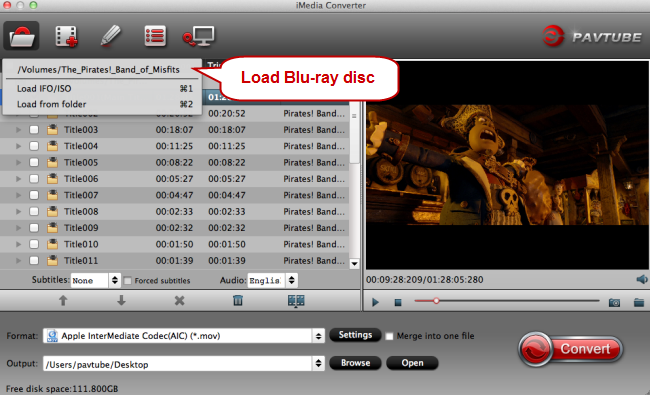
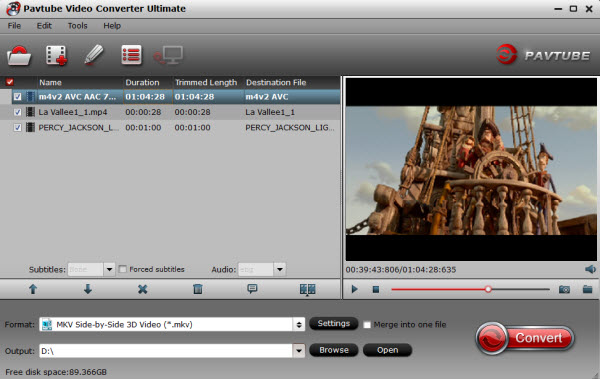
Mac users who have upgraded to the new Mac OS X 10.11 El Capitan may encounter with some video playing and editing issues since many video players or editing applications have not updated themselves with perfect support for this new OS. With Pavtube recently upgraded Mac products, you will get no problems to copy/backup 2D/3D Blu-ray/DVDdisc, convert and edit virtually any SD/HD/2K/4K video and audio formats on Mac OS X El Capitan. More Mac OS X El Capitan related articles are as below: 

More

Watch DVD Movies on Nvidia 3D Vision as 3D SBS MP4 files


The followings are the real user demands of ripping or copying DVDs to Nvidia 3D Vision using Pavtube DVD 3D Ripper: 

“ How to do I copy and upload DVD movies to Nvidia 3D Vision with 3D Effects? So I have tons of DVDs and I want to upload (Samsung Student MP4) and copied it to my WD My Cloud on my Network to play on my TV via my WD TV Live box. I used Pavtube DVDAid to make side-by-side MP4 videos from every DVD movie that I purchase so that I can view them on my PC using Nvidia 3D Vision.” 


Tips for 3D Movie fans >> 3D Blu-ray on Apple TV 3 | Best 3D Movie to Oculus Rift Converter | Top 10 3D VR Glasses/Headsets in 2015 | Best 3D movies for Gear VR 

From this question, we are aware that although many people are interested in the newest Nvidia 3D Vision. If you have an extensive collection of DVD’s lying around, you might be wondering how you can watch them all on your Nvidia 3D Vision. But how to get them playable on these 3D device and if doing converting from DVDs, is it will surely leaded to the loss of 3D effect? 

Here, we suggest you - Pavtube DVDAid (Read the review) as the DVD to Nvidia 3D Vision Converter can professionally rip DVD to Nvidia 3D Vision supported video format with fast speed and excellent output quality. In addition, this DVD Ripping tool can also keep your desired subtitles while converting DVD to various popular video formats like AVI, MP4, WMV, MPEG, MOV, FLV, MKV, 3GP, etc. as. 

Besides, It also supports outputting almost all the video formats that helps you to accomplish the 2D DVD to 3D MP4, WMV, MKV, AVI, MOV, etc conversion task easily. In addition, it offers you numerous 3D effects to decide on as. Pavtube is simpler to use, less steps, but just as many options if chosen. The equivalent Mac version is Pavtube DVDAid for Mac

Now, Just download, install and launch this great DVD Ripper and then follow the tutorial to play the DVD movies on your Nvidia 3D Vision. 


[Step-by-step]: How to enable DVD movies playback on Nvidia 3D Vision 

Step 1: Load DVD movies 

Launch the program and click Load DVD: Load DVD Folder, Load ISO Files or Load IFO files to import the DVD movies you want to rip. As you see, all added files will be listed below and you can preview them, take snapshots, choose subtitle and audio track, etc. as you like. 


Step 2: From the Format bar, find “3D Video”, you will find several presets for Side-by-Side 3D, Top-Bottom 3D and Anaglyph 3D. You can choose the one according to your device specification. SBS MP4/MKV is usually the recommended one for your Nvidia 3D Vision. (Read Differences Between Anaglyph 3D and Side-by-Side 3D). 


Note: NVIDIA 3D Vision requires the original polarized glasses from NVIDIA. Also your laptops display needs to support 3D and has to be set to 120Hz refresh rate. 

Step 3: Click “Settings” to adjust bitrate, frame rate, 3D mode and depth according to your own need. 

Step 4: Hit the “Convert” button to rip your DVD movies to SBS 3D video for Nvidia 3D Vision. When it finishes, click the “Open” option to locate the created 3D video, then transfer the converted 3D SBS MP4 files to your Nvidia 3D Vision. 

Now, you can freely watch DVD Movies on Nvidia 3D Vision for entertainment. So easy! 

Thursday, October 15, 2015

Video Tips for Handbrake on Mac OS X 10.11 El Capitan


At Times you need HandBrake Alternative software to achieve better SD/HD video and DVD/Blu-ray conversion on Mac OS X 10.11 El Capitan, and iMedia Converter for Mac is best recommended HandBrake Alternative for on Mac OS X 10.11 El Capitan. 

Read the Software review>> Pavtube Softwares Comparison | Pavtube DVDAid vs AnyDVD | ByteCopy & MakeMKV | Best Video Converter Ultimate Reviews... 

Handbrake is a open source video transcoder, which is wildly used by Mac OS users. It supports to transcode video and audio from nearly any format to MP4, MKV, AVI on iMac abd MacBook. With Handbrake, you can convert Videos, DVD, Blu-ray on Mac OS X for viewing on your iPad, iPhone, iPod touch easily. 

Following with this detailed HandBrake Mac Tutorial, you will learn how to rip DVD, Blu-ray and transcode videos on Mac OS X with Handbrake. 

Step 1: Download and Install Handbrake 

Firstly, you should download and install Handbrake for Mac on your Mac OS X. 


Note: Here, we can see that HandBrake for Mac OS X 10.6-10.10 is for 64 bit Intel. 

Step 2: Load source video to HandBrake and set Destination and Output 

Click the “Source” button on the main interface to add video, DVD or decrypted Blu-ray to the program. In the Destination section you can set the output folder by clicking Browse button. One thing you need to decide is what format (MP4, MKV, AVI, OGM) Output setting section also has 3 options you can choose: Large File Size, Web optimized and iPod 5G support. 


Note: Handbrake supports to input multiple file formats, but it can only convert them one by one, if you want to transcode many videos, please make sure you have enough time to do it. 

Step 3: Adjust video and audio settings 

You can adjust video filter, video, audio subtitles, chapters, etc to make the output videos more suitable. You should pay attention that when you select the birate, the higher bitrate you choose, the bigger size the output file will be, and the better quality you will get. 


Step 4: Start to convert video with Handbrake on Mac OS X 

Click on the Start button on the left top of Mac version HandBrake. The encoding time will depend on several variables including: the duration of the video file, the speed of your Mac computer and which Mac OS, Mac OS X Tiger, Leopard, or Mac OS X Snow Leopard. What other activity your computer is currently doing, the codec you selected (H264 or MP4). 

Conclusion of this Handbrake Tutorial for Mac: 

This is basic HandBrake Tutorial for Mac OS X users, for details explanation, you need to cast an eye on HandBrake official site. And as a free transcoding software, you may come across with unexpected issues when using HandBrake on your Mac from time to time. Handbrake has some limitations. For instance, it can load multiple video and copy protected DVD, but it does not support the encrypted Blu-ray disc. It only can be used to transcode a Blu-ray disc that the protection is first removed using a third party application. It does not support batch conversion and shut-down automatically after conversion. And the most severe problem is HandBrake just supports Mac OS X 10.6 - 10.10. The newest Mac OS X 10.11 El Capitan system is not supported by HandBrake. 

Therefore, it is better to find some HandBrake Mac version Alternative software to fill all the limitations that Handbrake lacks, such as backing up encryption Blu-rayripping DVD to iTunes, copying Blu-ray andDVD on Mac OS X El Capitan. Pavtube iMedia Converter for Mac is the recommended HandBrake Alternative. It is all in one solution for you to convert SD/HD videoS, rip DVD/Blu-ray to various formats on Mac OS X from 10.6 to 10.11 El Capitan. You can use the batch conversion functions to transcoding multiple files at a time. The versatile and distinctive editing functions can help you create elegant videos. 

Free download and install 


Other Download: 
- Pavtube old official address: http://www.pavtube.cn/imedia-converter-mac/ 
- Cnet Download: http://download.cnet.com/Pavtube-iMedia-Converter/3000-2194_4-76177788.html 

How to use HandBrake Mac Alternative on Mac OS X El Capitan? 

Step 1. Load your Blu-ray 

Run Pavtube iMedia Converter for Mac on Mac OS X El Capitan, load your Blu-ray disc, folder, ISO image files by clicking the "File" icon. 


Step 2. Choose target format 

Click the format bar to choose "HD Video" and "H.264 HD Video (*.mp4)". 


Step 3. Start conversion 

After everything is OK, click the big button "Convert" to start conversion on Mac OS X El Capitan. After conversion, you'll get your desired MP4 movie in output folder. 

That is easy to use HandBrake Mac Alternative to convert videos on Mac OS X El Capitan. Just try. 

If want more detailed video conversion steps, read this article: How to Convert Videos on Mac OS X El Capitan with Pavtube iMedia Converter for Mac? 

Read More: 

Good News! To thanks for your continuous support, Pavtube Official Website and Pavtube Facebook are now holding the biggest sale for this summer with fantastic 50% off discounts and giveaway. Pay less to get powerful Blu-ray/DVD/Video Converter to build your own home media center on this summer! 

Giveaway: First Five customers can share this post, email us your order numer and the snapshot to win one more FREE license, no product limit! 

Related Article: 


Src 
HandBrake Mac Tutorial on Mac OS X 10.11 El Capitan 

Wednesday, October 14, 2015

Viewing 3D movies on Nvidia 3D Vision for Keeping 3D Effects


3D is an excellent medium to make more representational models, visuals or movies in Design, Engineering, CAD/CAM and Simulation applications. Nvidia pioneered Stereoscopic 3D with their 3D Vision Technology. Displays and projectors need to be “Nvidia certified”. The Nvidia 3D Vision set includes shutter glasses with an infrared emitter. Especially designed to help NVIDIA 3D Vision glasses watch movies on their PC, the program is capable of playing both 3D and regular movies. (Learn how to play 3D movies on computer). 


Hot Searh: 3D Movies on Gear VR | 3D Movies on Lakento MVR | 3D Movies on Oculus Rift DK2 | 3D movies to Lakento MVR Glasses 

How can you take a movie that downloaded from Youtube or other websites and transform it into a 3D experience? Here are many different video formats you have, just like: MKV, AVI, ISO, WMV, FLV, MTS, M2TS, TS, etc. All of them can not be played Nvidia 3D Vision. Here are only several file formats are supported, including AVI, MPG, MP4, WMV, MKV or FLV, as well as the most common picture files. So, you cannot playing the downloaded 3D Movie files and Blu-ray, DVD, in order to open some video types, you might need to install extra decoders and filters. 

With the assistant of the Pavtube 3D Video Converter Ultimate you can easily solve all “NVIDIA 3D Vision playback issues”. It helped lots of 3D movie fans and very easy to use. It not only for Create 3D movies out of 2D sources, but also can create 3D movies out of source 3D Blu-ray content in 5 different 3D video formats: MKV, MP4, MOV, WMV and AVI for multiple 3D media players like HTC EVO 3D, LG Optimus 3D P920, 3D HDTV, 3D game consoles, etc. Learn >> Why Choose Pavtube 3D Video Converter.


Step-by-step: How to Move 3D Moviess to SBS MP4 for NVIDIA 3D Vision? 

Now, Free Download this top 3D Video Converter for Nvidia 3D Vision:


Other Download:


- Pavtube old official address:http://www.pavtube.cn/blu-ray-video-converter-ultimate/

- Cnet Download: http://download.cnet.com/Pavtube-Video-Converter-Ultimate/3000-2194_4-75938564.html

Step 1: Insert your 3D/2D Blu-ray or standard DVD movie to disc drive, and click “Load from disc” button to load Blu-ray or DVD from ROM. For video file, click the “Add video” button, browse to computer hard drive and import video into this app.


Step 2: Tap on “Format” bar and find “3D Video”, there are a lot of format options for you. “MP4 Side-by-Side 3D Video (*.mp4)” is recommended for Samsung Gear VR. (Read the differences Between Anaglyph 3D and Side-by-Side 3D)


Step 3. You can adjust target video settings and 3D effect.

Click “Settings” which is next to “Format”, free change your target video size, bitrate, frame rate and 3D depth. If you want to get best video quality, pls switch them to “original”.


Step 4. Start rip 3D movies to SBS MP4 3D.

When everything is OK, just press the “Convert” button to start the conversion. It will not take much time. Just wait for the conversion process to get done. Once the conversion finished, you are able to get 3D SBS MP4 files via clicking “Open” button.

Now, Simply select one of your files and Play 3D Movies in full immersion with Nvidia 3D Vision for keeping 3D effects! Have Fun!

More 

How to Watch ISO Movies in 3D With Nvidia 3D Vision 
How-To: Get TiVo shows onto your Android for on-the-go viewing 
H.265 to PPro: Edit Samsung NX1 H.265 in Premiere Pro CC on Mac Yosemite 
Best Canon MXF Converter : Ingest Canon MXF into FCE 
Convert DJI Inspire 1 4K Files to 1080p for Editing on Mac/PC 
Convert and Transfer Sony XDCAM footage to QuickTime MOV on Mac 
Can I play Sony XDCAM EX MP4 video with QuickTime 
Merge/Join hard drive camera recored MTS videos into one with no conversion 

Src 

How to Watch 3D movies using Nvidia 3D Vision

Pavtube Upgrade Mac Products with Support for Mac OS X El Capitan

Pavtube upgrades with support for Mac OS X El Capitan for all its Mac Blu-ray/DVD/Video products, all media converting, playing and editing issues can be solved on El Capitan with Pavtube Mac Products. 


The newly arrived Mac OS X El Capitan featuring the ability to run multiple apps is fantastic. But people are out of luck to entertain themselves with various media files on the new operating system since most Mac video conversion application are not updated with support for El Capitan. To get all those issues fixed up, Pavtube Studio 
Pavtube Sutio has recently updated all its Mac Blu-ray/DVD/Video products with perfect support for Mac’s new operating system - Mac OS X El Capitan. Products that works compatible well with El Capitan including:Pavtube Video Converter for MacPavtube HD Video Converter for MacPavtube MTS/M2TS Converter for MacPavtube MXF Converter for MacPavtube iMixMXFPavtube BDMagic for MacPavtube ByteCopy for MacPavtube DVDAid for MacPavtube iMedia Converter for Mac


Copy/Backup Blu-ray/DVD on El Capitan 
Have problem to copy/backup Blu-ray/DVD disc on Mac OS X El Capitan, never mind, with Pavtube newly upgraded Blu-ray/DVD products, you will get no difficulty to make a full disc copy or the main movie copy of the original 2D/3D Blu-ray/DVD disc on Mac OS X El Capitan. Besides that, the program also enables you to rip/convert Blu-ray/DVD disc to various different file formats on El Capitan platform for playing on iPhone/iPad/iPod, Android phone and tablets, Windows phones or tablets, game consoles, HD media players, streaming to Apple TV/Amazon Fire TV/Roku, etc. 

Play and edit videos on El Capitan 
Play and edit any video files on Mac OS X El Capitan can also be easily achieved with Pavtube upgraded Mac Video Converter applications. You can effectively convert virtually any file formats including AVI, WMV, MP4, MOV, FLV, VOB, MKV, MKV, MTS, M2TS, Tivo, H.265 in SD, HD, 2K, 4K videos to your desired file formats or devices and programs optimized file formats for better viewing. For camera and camcorder users, you will have a fast and fluid workflow on Mac OS X El Capitan with our program by exporting professional video editing codec such as Apple Prores Codec for Final Cut Pro 6/7/x, Apple Intermediate Codec(AIC) for iMovie/Final Cut Express, DNxHD MOV for Avid Media Composer, After Effects CC/Adobe Premiere Pro/Adobe Premiere Elements/Sony Vegas specially optimized file formats, etc. 

Other downloads: 

BDMagic for Mac 
- Pavtube old official address: http://www.pavtube.cn/blu-ray-ripper-mac/ 
- Cnet Download: http://download.cnet.com/Pavtube-BDMagic/3000-7970_4-76177782.html 

ByteCopy for Mac 
- Pavtube old official address: http://www.pavtube.cn/bytecopy-mac/ 
- Cnet Download: http://download.cnet.com/Pavtube-ByteCopy/3000-7970_4-76177783.html 

iMedia Converter for Mac 
- Pavtube old official address: http://www.pavtube.cn/imedia-converter-mac/ 
- Cnet Download: http://download.cnet.com/Pavtube-iMedia-Converter/3000-2194_4-76177788.html 

Video Converter for Mac 
- Pavtube old official address: http://www.pavtube.com/video-converter-mac/ 
- Amazon Store Download: http://www.amazon.com/Pavtube-Video-Converter-Mac-Download/dp/B00QIBK0TQ 
- Cnet Download: http://download.cnet.com/Pavtube-Video-Converter/3000-2194_4-76179460.html 

HD Video Converter for Mac 
- Pavtube old official address: http://www.pavtube.com/hd-video-converter-mac/ 
- Amazon Store Download: http://www.amazon.com/Pavtube-Video-Converter-Mac-Download/dp/B00QI9GNZS 
- AppStore Download: https://itunes.apple.com/de/app/pavtube-hd-video-converter/id502792488?mt=12 
- Cnet Download: http://download.cnet.com/Pavtube-HD-Video-Converter/3000-2194_4-76177786.html 

MTS/M2TS Converter for Mac 
- Pavtube old official address: http://www.pavtube.com/mts-converter-mac/ 
- Amazon Download: http://www.amazon.com/Pavtube-MTS-M2TS-Converter-Download/dp/B00QIE3U0Y 
- Cnet Download: http://download.cnet.com/Pavtube-MTS-M2TS-Converter/3000-2194_4-76177029.html 

MXF Converter for Mac 
- Pavtube old official address: http://www.pavtube.com/mxf-converter-mac/ 
- AppStore Download: https://itunes.apple.com/us/app/pavtube-mxf-converter/id502807634?mt=12 
- Amazon Download: http://www.amazon.com/Pavtube-MXF-Converter-Mac-Download/dp/B00QID8K28 
- Cnet Download: http://download.cnet.com/Pavtube-MXF-Converter/3000-2194_4-76177789.html 

iMixMXF 
- Pavtube old official address: http://www.pavtube.com/imixmxf-mac/ 
- Amazon Download: http://www.amazon.com/Pavtube-Studio-iMixMXF-Download/dp/B00QI7MY4Y 
- Cnet Download: http://download.cnet.com/Pavtube-iMixMXF/3000-2194_4-76171460.html 

Further Reading: 

Monday, October 12, 2015

How to Play 3D Video on Nvidia 3D Vision Player?


Compared to 2D video, 3D video gives us an entirely new sensory experience. With the hotter and hotter well-developed 3D technology, more and more people are fond of watching 3D videos on Nvidia 3D vision player with the vivid image, right? Have you got the experience of enjoying 3D movies? Virtual 3D world is on its way, just grab it and follow this 3D wave. 


Hot search: 3D MTS on 3D TV | MOV to 3D Smart TV | 3D M2TS to SBS MP4 

NVIDIA has brought high-quality, stereoscopic 3D Vision viewing capabilities. This means that you can view thousands of 3D videos already on the website like YouTube’s 3D channels today in full color and high definition using an Nvidia 3D vision player. As you might know the Nvidia 3D Vision player is actually a special free version of Peter Wimmer’s Stereosopic Player that is limited to support only 3D Vision. Is there an easy, quick and affordable way to play 3D video on Nvidia 3D vision player seamlessly? 

We here would like to introduce you the professional 3D Video Converter- Pavtube Video Converter, which can meet the most people’s basic need. With it, user can convert 3D video to 3D MP4/AVI/WMV/DiVX/MKV HD video formats, and 3D video to general 2D video formats for the convenience of view or playback it on your iPad, HDTV, Apple TV, Google TV and other traditional general 2D video Players (software player and hardware player). If you are running on Mac operating system, you can refer to the equivalent version- Pavtube Video Converter for Mac. It can also convert 3D video to 3D SBS MP4 for Nvidia 3D vision player. 
 
Other Download: 
- Pavtube old official address: http://www.pavtube.com/video_converter/ 
- Amazon Download: http://download.cnet.com/Pavtube-Video-Converter/3000-2194_4-75734821.html 
- Cnet Download: http://download.cnet.com/Pavtube-Video-Converter/3000-2194_4-75734821.html 

More details are allowed here for you to take the advice: 

Step 1: Run the best 3D Video Converter, and click the “Add video” button to load 3D videos. If you want to load several files at one time, “Add from folder” button is available. 


Step 2: Click “Format” bar to determine output format. Follow “3D Video>>MP4 Side-by-Side 3D Video (*.mp4)” as output format. 


Step 3: Adjust video and audio parameters, including the bit rate of video and audio, the codec of video and audio, video size, sample rate, frame rate, audio channels, etc., in the Profile Settings by hitting “Settings” button. 

Step 4: Finally, when you have done all the preparation work, it’s time to go back to the main interface to click the “Convert” item to end the work. 

Conclusion: You have no needs to wait for a long time cause this program has the faster conversion speed and easy operation to converting the 3D video files. Just enjoy yourselves with the high definition and vivid effects on Nvidia 3D vision player with Nvidia 3D vision glasses! 

More 

How to Watch ISO Movies in 3D With Nvidia 3D Vision? 
How-To: Get TiVo shows onto your Android for on-the-go viewing 
Merge/Join hard drive camera recored MTS videos into one with no conversion 
H.265 to PPro: Edit Samsung NX1 H.265 in Premiere Pro CC on Mac Yosemite 
Best Canon MXF Converter : Ingest Canon MXF into FCE 
Convert DJI Inspire 1 4K Files to 1080p for Editing on Mac/PC 
Convert and Transfer Sony XDCAM footage to QuickTime MOV on Mac 
Can I play Sony XDCAM EX MP4 video with QuickTime 

Src 
Watch 3D Video on Nvidia 3D Vision Player 

Friday, October 9, 2015

How to Watch ISO Movies in 3D With Nvidia 3D Vision?


Many people don’t know how to watch ISO videos on the PC using Nvidia 3D Vision in 3D effect. For this, some of them ask for help in relevent forums. I happen to solved this problem by myself recently so here i will share my thread for those still do not get the way. The follow is a question i saw on the web: 

“Howdy all, I recently got the new Nvidia 3D Vision kit for my birthday gift and I have upgraded my computer to a 3D gaming machine. I have played Death Track Resurrection, Dungeon Runners and many other 3D popular games. Now, I am ready to bring the 3D movie experience to my 3D PC with Nvidia 3D Vision and watch 3D movies in the comfort of my home. I have plenty of ISO movies that I purchased and i want to make side-by-side MP4 videos from every ISO movie so that I can view them on my PC using Nvidia 3D Vision. I have no video editing tool in my hand now. So any idea do you have and please tell me the steps. Thank you in advance.” 

Yesterday, i saw someone ask for assistant in Roxio Community and I recently used a easy-to-use Blu-ray Ripper by coincidence that can recommend to him to backup ISO to Nvidia 3D Vision in side-by-side MP4 video. Pavtube BDMagic is exactly the one i want to recommend. With it, you can enjoy wonderful 3D movie experience by your Nvidia 3D Vision. On the one hand, it can convert all your ISO movies to SBS MP4 videos for true theater entertainment at home with ultra fast speed.. And on the other hand, it also enables you to rip your 2D/3D Blu-ray disc and folders and DVD to MP4 in 3D side-by-side, Top-Bottom and Anaglyph effect with ease. You are allowed to set the 3D depth to adjust the 3D effect as well. 

Free download and install: 
  

Other Download: 
- Pavtube old official address: http://www.pavtube.cn/blu-ray-ripper/ 
- Cnet Download: http://download.cnet.com/Pavtube-BDMagic/3000-7970_4-75922877.html 

Steps to backup ISO to Nvidia 3D Vision in SBS MP4 

Step 1: Load ISO movies to software 

Launch ISO to Nvidia 3D Vision converter. Click "File" in top left corner and then follow "Load IFO/ISO" to import ISO movie. Mac users can try the Mac version ISO to Nvidia 3D Vision converter. 


Step 2: Select format and set profile 

Tap on Format bane and open profile list, choose “3D Video” and trace to “MP4 Side-by-Side 3D Video(*.mp4)”. 


Tip: If necessary, you could adjust video codec, bitrate, etc to get better quality 3D MP4 video. Meanwhile, you can choose 3D Depth in Profile Settings to avoid images misaligned. (Read the differences between Anaglyph 3D and Side-by-Side 3D


Step 3: Convert ISO to Nvidia 3D Vision 

Hit on the “Convert” button and ISO to MP4 Side-by-Side conversion begins. When the conversion is done, and now you can locate it by opening the output folder. 

With this process, you can watch ISO in 3D with Nvidia 3D Vision comfortably at home. If you are keen on 3D enjoyment, you can still use this software to rip Blu-ray to Oculus Rift DK2 or transfer 3D Blu-ray to Samsung Gear VRfor your hobby.