With the popularity of HD cameras and the preference for 4K UHD/1080P high definition, a very short video can easily run several gigabytes in size. This enforces users to reduce and compress video size to make the video smaller for different reasons. For example, to allow the videos to be uploaded to web like YouTube or sent via email to family or friends, you have to make video size smaller than 2GB for YouTube and 25MB for most email system. Another simple example, you will need to pay extra $100 to get an iPhone 6S with larger storage. So, in the final analysis, is there any video size compressor or way to compress and reduce video file size from HD/UHD MP4, MKV, AVI, MOV etc? Windows Movie Maker is a professional compressor claiming that they can reduce video file size. However, with the release of Windows 10, Windows Movie Maker is no longer available. Here is an alternative that works equally well to make large files smaller, Pavtube Video Converter Ultimate. This file compressor can significantly shrink the file size without losing any quality by converting the video to smaller formats like FLV, WMV, AVI, RMVB etc, adjusting various video audio settings, cutting unwanted parts etc. I have used it to compress a MP4 video which is 108MB. After compression the size is 30.1MB only while I can’t identify any quality loss. It can reduce up to 70% of the file size from 4K UHD/HD 1080P. Mac users please turn to Pavtube iMedia Converter for Mac. 
 Other Download: - Pavtube old official address: http://www.pavtube.cn/blu-ray-video-converter-ultimate/ - Cnet Download: http://download.cnet.com/Pavtube-Video-Converter-Ultimate/3000-2194_4-75938564.html
 Other Download: - Pavtube old official address: http://www.pavtube.cn/imedia-converter-mac/ - Cnet Download: http://download.cnet.com/Pavtube-iMedia-Converter/3000-2194_4-76177788.html How to Compress 4K/1080P HD Video Size without Losing Quality Step 1: Load the Video File Launch this video reducer and click “Add File” to load the video files you want to resize.
  Step 2: Choose Output Format To make the video file size smaller, choose one of the formats with smaller size. To upload to web like YouTube, you’re suggested to convert the video to FLV; to send the video via email, select WMV as the output format; to playback on Android iOS devices, choose MP4 (or the specific device profile like iPhone 6S/6S Plus/6/6 Plus/5S and more).
  Step 3: Tweak the Video Settings In the settings window, you are allowed to adjust various parameters like Resolution, Frame Rate, Bit Rate, etc. Note that the lower parameters value will reduce video size, but it will also degrade the video quality. So make a balance between the quality and size. Tips: you can also edit the video to further reduce the video file size, like trim the unwanted parts or cut the necessary length etc.
  Step 4: Start to Compress Video Size After finish the above steps, click the “Convert” button to start shrink video file size now. Hot News: Happy Halloween and Hurry up!!! Pavtube’s 2015 Halloweenn Promotion is on the road (Offer Valid from Oct. 23, 2015 to Nov. 6, 2015). This Time Pavtube offers up to 40% Off discount on its featured software apps. Never miss this chance to get what you need. More Merge/Join hard drive camera recored MTS videos into one Edit Samsung NX1 H.265 in Premiere Pro CC on Mac Best Canon MXF Converter : Ingest Canon MXF into FCE Convert DJI Inspire 1 4K Files to 1080p for Editing on Mac/PC Transfer Sony XDCAM footage to QuickTime MOV on Mac Can I play Sony XDCAM EX MP4 video with QuickTime Watch ISO Movies in 3D With Nvidia 3D Vision? Get TiVo shows onto your Android for viewing Src Best way to Compress 4K/1080P HD Video Size
In this guide, you will learn the way to transcode/convert 3D AVCHD MTS files to playable and editable AVI format so that you can easily watch and edit the recorded 3D AVCHD videos on HD TV, PC or Mac. In the camcorder market, 3D camcorders may be the new hot devices, uses buy 3D camcorders to record unusual images. Watching 3D movies at theater is so wonderful, and the 3D videos give us an experience like in a real world. Many brand camcorder manufacturers such as Sony, Panasonic and JVC has announced AVCHD 3D camcorders, the detailed models are as follows: Sony: HDR-TD10/10E, HDR-TD20/20V, DEV-3/DEV-5, HXR-NX3D1 Panasonic: HDC-SDT750, HDC-Z1000, AG-3GP1 JVC Everio: GS-TD1BUS, GZ-HM960BUS, GY-HMZ1U After capturing the AVCHD 3D video footage, you may want to have more access to these 3D .mts/.m2ts files, so is there any way allow us to edit and play 3D videos at home freely? At this time, you need a 3D AVCHD Converter for Win/Mac to convert recorded 3D files. If you’re looking for a solution for this, check out Pavtube MTS/M2TS Converter andMTS/M2TS Converter for Mac, which can help you convert recorded 3D MTS files to AVI format with 3D effect. The program packs great 3D conversion feature, below is a brief guide for you to convert 3D AVCHD video to 3D AVI for editing and playback. Step 1: Import the 3D MTS file. Run Pavtube 3D AVCHD Converter for Mac as the best Mac 3D MTS to 3d AVI Converter. Click “Add Video” or “Add from folder” icon to load 3d .mts video clips. Step 2. Choose 3D AVI as the output format Choose ” AVI Side-by-Side 3D Video” or “AVI Anaglyph 3D Video” or “AVI Top-Bottom 3D Video(*.avi)” as target format from “3D Video” option. Step 3: Settings (Optional) You can click “Settings” button and enter “Profile Settings” panel to adjust video and audio settings if necessary. Users are free to reset codec, bit rate, frame rate, sample rate, and audio channels. Step 4. Click “convert” button to start transcoding 3D MTS files to 3D AVI fomat. The Mac 3D MTS to 3D AVI Converter can help you convert recorded 3D mts video files with high video quality, video and audio synchronization are perfectly guaranteed. Just have a try now! More Can I play Sony XDCAM EX MP4 video with QuickTime Watch ISO Movies in 3D With Nvidia 3D Vision? Get TiVo shows onto your Android for viewing Merge/Join hard drive camera recored MTS videos into one Edit Samsung NX1 H.265 in Premiere Pro CC on Mac Best Canon MXF Converter : Ingest Canon MXF into FCE Convert DJI Inspire 1 4K Files to 1080p for Editing on Mac/PC Transfer Sony XDCAM footage to QuickTime MOV on Mac Src Convert 3D MTS to 3D AVI on Win/Mac with best 3D AVCHD
Pavtube launched 40% OFF Halloween Promotion from October 21 to November 6, 2015 when users can get top Video/DVD/BD Converter for Win/Mac with the least money. pavtube halloween promotion,halloween special offer, halloween sale 2015 Halloween is coming. To give you a better Halloween celebration, Pavtube holds 40% off Halloween promotion from October 21 to November 6, 2015. During the period, you can get the professional Blu-ray/DVD Ripper and Video Converter for Win/Mac with less money than any other campaign. During Halloween, many people will not just watch Halloween movies but make Halloween videos by themselves. No matter Halloween movies enjoyment or Halloween video production, you probably need a video converter. For example, when you want to play your Blu-ray/DVD Halloween disc on your iPad Pro, Surface Pro 3, you can rip the disc to the device supported format with Pavtube BDMagic or Pavtube DVAid. Another case, you record the Halloween party scene and you are about to upload the camcorder video to Facebook to show your cool dressup, you’d better choose to transcode the camera video to Facebook or Vimeo accepted video with Pavtube Video Converter Ultimate. No matter what situations about video editing and producing, you can find the software you want at Pavtube Studio. Pavtube product is closed-source, not like Handbrake. But it deserves to pay for its life-long technical support and update in time to compatible with any Win/Mac system upgrade. Catch this opportunity and enjoy the best video production experience with the least money. The price comparison of Pavtube featured products between Halloween price and original price is as below:
- Pavtube Video Converter Ultimate: Original price $65, Now $52
- Pavtube BDMagic: Original price $49, Now $34.3
- Pavtube DVDAid: Original price $35, Now $21
- Pavtube ByteCopy: Original price $42, Now $33.6
Note: This attractive price will only be get until November 6, 2015. Please bear in mind all software programs will go back to original prices once the Halloween special offer 2015 ends. Time-limited. What are you waiting for? Action now!
This article walks you through the whole process of converting 3D MTS footages to MOV Side-by-Side 3D Video with best 3D effects on 3D TV on Mac. Don’t forget your 3D glasses.  3D is a fantastic technology that was once only reserved for ultra exclusive film studios. Now, many users can purchase stereoscopic 3D cameras like Sony Handycam 3D at decent prices. However, it receives cheers and boos. The only problem is that many users are facing the problem while playing Sony Handycam 3D MTS on 3D TV. What’s the reason and is there any way to view 3D MTS videos from Sony Handycam on a 3D TV with ease? Tips: More hot topics about the complete workflow to transcode, edit, play, burn and share your Sony camera footage. First of all, let’s look at a case: “I’ve ordered a brand new Sony HDR-TD 10 3D-Camcorder. I just wonder how to watch my Sony 3D MTS recordings on my Samsung 3D Smart TV with 3D effect. I did a lot of tests with some freeware, but in the final movie clip 3D images are not aligned perfectly, as if they were slightly shifted.” With all of the surrounding of 3D technology and production in the last few years, more and more TVs can support stereoscopic 3D. Samsung 3D Smart TV, Sony 3D LED TV, LG 3D TV and so on are impossible to play Sony Handycam 3D MTS files directly because of the format limitation. The most effective way to transcode and play 3D MTS footages on 3D TV, a 3D MTS converter is a must. Here I highly recommend Pavtube 3D MTS/M2TS Converter for Mac I have used. It works perfectly for converting 3D MTS files to a proper format for easy playback on 3D TV keeping original 3D effects. Sony 3D MTS/M2TS converter is reasonably priced and easy to use. The other similar products may convert the audio a few frames behind the video no matter what settings you use, but this Sony 3D MTS converter works excellent and converts seamlessly. How to convert 3D MTS to SBS 3D MOV/MKV/MP4/AVI for smooth playback on 3D TV with 3D effects? Step 1: Backup your 3D MTS video from your camcorder to hard drive. Install and launch 3D MTS/M2TS Converter for Mac. Drag and drop 3D MTS files to the software. You can import multiple files at once thanks to batch conversion.
  Step 2: Set 3D TV friendly format. Click the drop-down list in the format line to get the format box. Then choose “3D Video>>MOV Side-by-Side 3D Video (*.mov)” as output format. Tips: Generally, MOV is a well-accepted file format for its ability to save memory storage and keep up the video quality. Of course, 3D Video in .mp4 and 3D Video in .mkv and 3D Video in .avi are all supported as well.
  Step 3: If you like, you could adjust video codec, bitrate, frame rate and so on to get better video quality in saved 3D MOV video. Meanwhile, you could choose 3D anaglyph and Depth in Profile Settings to avoid images misaligned. It’s optional.
  Step 4: You can preview to check the final result. Once you are satisfied with it, click the “Convert” button to start converting Sony Handycam 3D MTS video files to MOV Side-by-Side 3D Video format. It will take you a little while. Conclusion: After conversion, you’ll get no troubles in watching Sony 3D MTS videos on 3D TV with wonderful 3D effect! Follow the steps and have a try! Best wishes for you to have a nice day!
Compare to the previous generations of Mac OS X 10.10 Yosemite, there are many new welcome features in 10.11 El Capitan. Fortunately, Mac users are able to upgrade to the new El Capitan for free or easily partition Mac to install both El Capitan and Yosemite for conveniently switching one to another. Following article will make a detailed comparison of El Capitan and Yostemite in many mayor aspects. Pavtube has upgraded with El Captian support for all its Mac Blu-ray/DVD/Video products.  Performance in El Capitan VS Yosemite Apps in El Capitan will load apps up to 1.4 times faster and switching between apps will be twice as fast. Compare that to Yosemite: since its introduction many Mac users have been painfully aware of lags and slowdowns, such as stuttering animations and network connectivity issues. We experienced nothing like this in El Capitan. Look and feel in El Capitan vs Yosemite OS X El Capitan's user interface use a variation of the San Francisco font that was introduced with the Apple Watch and also features the iOS 9. San Franciso is much more Retina-friendly compared to Yosemite's use of Helvetica Neue. Force Touch trackpad support was introduced with Yosemite and in El Capitan there's additional setting within the Trackpad pane of System Preferences to deactivate the click noise. Referred to as Slient Clicking, this somehow doesn't compromise the degree of feedback, which is still handled via the Click slider. The El Capitan bar can now autohide via a setting in the General pane of System Preferences, in the same way that the Dock can dive out of the bottom of the screen in Yostemite and earlier releases of OS X. If you've used Full Screen mode in Yosemite then you'll already have experienced this feature but now it can be used all the time to gain a precious few centimeters of desktop space. Core tools in El Capitan vs Yosemite Safari: The new Safari on Mac OS X El Capitan is the perfect browser tool for your Mac device. The New Safari allows you to Pin your favorite websites, thus you can keep them opened, likewise you can mute audios without checking the tab from which the sound is coming from. The Develop menu of Safari, accessible via the Advanced pane within Safari's Preferences, now features a cool Responsive Design mode that lets you switch the web page to dimensions used on various Apple devices. Mail: As with Safari, feature additions in Mail within El Capitan are subtle compared to Yosemite. With the new Swipe gesture and improved full screen support, you can now optimize the way you read or manage your mails better on Mac OS X El Capitan - you can use this feature as a quick correspondence handler, and also manage your contacts and calendar much better from your inbox. With one swipe, you can mark an email as read or unread. Notes: Notes in El Capitan is essentially a whole new app compared to Yosemite, featuring more control over text formatting. The app is also now a share destination from within other apps, so you can send a map location straight to a new note, for example, or even a file from Finder/the desktop. The Reminders app can also receive items in this way via its own new entry on the share menu. To gain access to the new notes features, make sure upgrade your Notes iCloud database when you first run Notes on El Capitan, but doing so also makes your existing notes instantly incompatible with earlier versions of Apple's operating system. Maps: The enhanced Maps available on Mac OS X El Capitan provides maximum public transit information you can ever ask for, thus you will never miss your way even in a big city. You will have access to in-built public transport maps, directions and schedules. With El Capitan, you can easily plan your route with just few clicks. System tools in El Capitan vs Yosemite Spotlight: The new Spotlight window introduced in Yosemite can be moved around in El Capitan by clicking and dragging. It can also be resized to show more than a handful of results. Spotlight in El Capitan can also respond to Siri-like queries, such as "photo from last November in Germany". Mission control: El Capitan also comes with a full screen tweaks and mission control features. The mission control displays the names of existing apps at the top of the screen page, and this has replaced the thumbnail feature on the Yosemite. Disk Utility: Disk Utility has been given a visual overhaul compared to Yosemite and now features a bar graph showing how full a partition is, and what kind of files are taking up the space. Disk Ultility: The Disk Utility has been given a visual overhaul compared to Yosemite and now features a bar graph showing how full a partition is and what kind of files are taking up the space. Disk repartitioning within Disk Utility is now handled via a more common sense pie chart representing the entire disk, with a handle on its border that can be dragged to resize individual partitions. Mac users who have upgraded to the new Mac OS X 10.11 El Capitan may encounter with some video playing and editing issues since many video players or editing applications have not updated themselves with perfect support for this new OS. With Pavtube recently upgraded Mac products, you will get no problems to copy/backup 2D/3D Blu-ray/DVDdisc, convert and edit virtually any SD/HD/2K/4K video and audio formats on Mac OS X El Capitan. More Mac OS X El Capitan related articles are as below:
More
The followings are the real user demands of ripping or copying DVDs to Nvidia 3D Vision using Pavtube DVD 3D Ripper: “ How to do I copy and upload DVD movies to Nvidia 3D Vision with 3D Effects? So I have tons of DVDs and I want to upload (Samsung Student MP4) and copied it to my WD My Cloud on my Network to play on my TV via my WD TV Live box. I used Pavtube DVDAid to make side-by-side MP4 videos from every DVD movie that I purchase so that I can view them on my PC using Nvidia 3D Vision.” 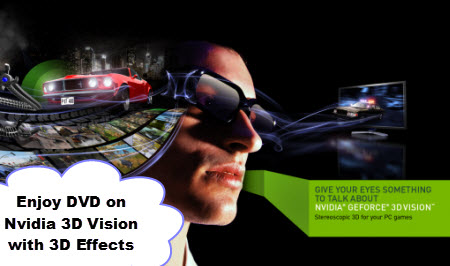 Tips for 3D Movie fans >> 3D Blu-ray on Apple TV 3 | Best 3D Movie to Oculus Rift Converter | Top 10 3D VR Glasses/Headsets in 2015 | Best 3D movies for Gear VR From this question, we are aware that although many people are interested in the newest Nvidia 3D Vision. If you have an extensive collection of DVD’s lying around, you might be wondering how you can watch them all on your Nvidia 3D Vision. But how to get them playable on these 3D device and if doing converting from DVDs, is it will surely leaded to the loss of 3D effect? Here, we suggest you - Pavtube DVDAid (Read the review) as the DVD to Nvidia 3D Vision Converter can professionally rip DVD to Nvidia 3D Vision supported video format with fast speed and excellent output quality. In addition, this DVD Ripping tool can also keep your desired subtitles while converting DVD to various popular video formats like AVI, MP4, WMV, MPEG, MOV, FLV, MKV, 3GP, etc. as. Besides, It also supports outputting almost all the video formats that helps you to accomplish the 2D DVD to 3D MP4, WMV, MKV, AVI, MOV, etc conversion task easily. In addition, it offers you numerous 3D effects to decide on as. Pavtube is simpler to use, less steps, but just as many options if chosen. The equivalent Mac version is Pavtube DVDAid for Mac. Now, Just download, install and launch this great DVD Ripper and then follow the tutorial to play the DVD movies on your Nvidia 3D Vision.
 [Step-by-step]: How to enable DVD movies playback on Nvidia 3D Vision Step 1: Load DVD movies Launch the program and click Load DVD: Load DVD Folder, Load ISO Files or Load IFO files to import the DVD movies you want to rip. As you see, all added files will be listed below and you can preview them, take snapshots, choose subtitle and audio track, etc. as you like.
 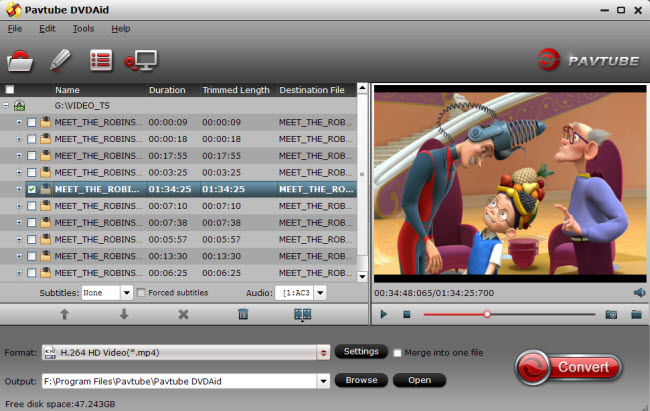 Step 2: From the Format bar, find “3D Video”, you will find several presets for Side-by-Side 3D, Top-Bottom 3D and Anaglyph 3D. You can choose the one according to your device specification. SBS MP4/MKV is usually the recommended one for your Nvidia 3D Vision. (Read Differences Between Anaglyph 3D and Side-by-Side 3D).
 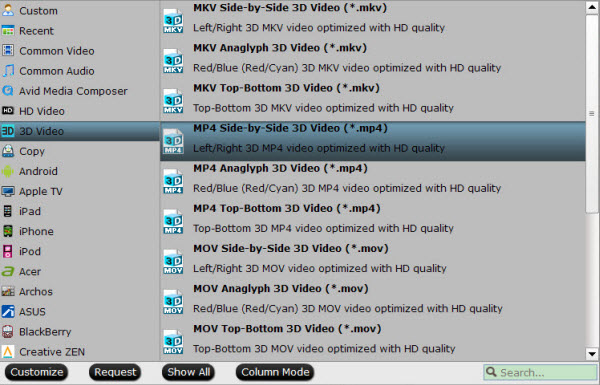 Note: NVIDIA 3D Vision requires the original polarized glasses from NVIDIA. Also your laptops display needs to support 3D and has to be set to 120Hz refresh rate. Step 3: Click “Settings” to adjust bitrate, frame rate, 3D mode and depth according to your own need. Step 4: Hit the “Convert” button to rip your DVD movies to SBS 3D video for Nvidia 3D Vision. When it finishes, click the “Open” option to locate the created 3D video, then transfer the converted 3D SBS MP4 files to your Nvidia 3D Vision. Now, you can freely watch DVD Movies on Nvidia 3D Vision for entertainment. So easy!